Refer

Then "Get Started".

"Add and Continue"
Then Proceed to Payment method.


MX records are DNS settings associated with your domain that direct its mail to the servers hosting your users' mail accounts. These settings are managed by your domain host, not by Google. To make sure mail always gets delivered, you typically create records for multiple servers, all of which can deliver mail to users. That way, if one server is down, mail can be routed to another server, instead. You determine which servers get tried first by assigning priorities, using values like 10, 20, 30, and so on. The lowest value gets highest priority.


cPanel includes three standard webmail applications (Web mail is a tool that allows you to send and read emails directly from any computer connected to the internet.)
Here , we are going to understand ,
What is a domain name ?
---------------------------------
Well , I am starting from the basics.
Domain name is an addressing construct used for identifying and locating computers on the Internet.
http://landecsurvey.com/ is a website address. Here , landecsurvey is the domain name & this is a unique name and there can not be any duplicates.Refer Some introductions to web .
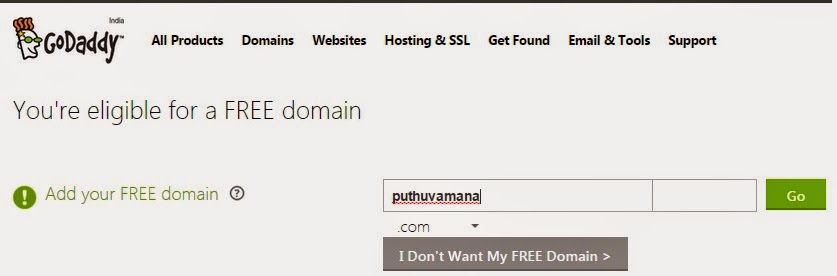
Here , we are using Godaddy to register a domain name.
First , create a user account in Godday , and sign-in to access your account.
Now , search for a domain name , here I am searching for puthuvamana.com .
See the picture below :

- Taking a domain name
- Hosting
- Set up a new Hosting Account
- cPanel Homepage
- Setting up an email address
- How to access your mail ?
- Create a Google mail for the domain
- Changing Domain to Google (To get a Google mail)
- Start using new Gmail
- Creating web sites
What is a domain name ?
---------------------------------
Well , I am starting from the basics.
Domain name is an addressing construct used for identifying and locating computers on the Internet.
http://landecsurvey.com/ is a website address. Here , landecsurvey is the domain name & this is a unique name and there can not be any duplicates.Refer Some introductions to web .
1 : Taking a Domain Name
Here , we are using Godaddy to register a domain name.
First , create a user account in Godday , and sign-in to access your account.
Now , search for a domain name , here I am searching for puthuvamana.com .
See the picture below :
Click "Search".
Note that , the domain name must be unique. So , if this particular domain name is not registerd , we can see ,


If we want to register domain name only , click continue to cart" .It will lead to another page , where we can give our banking details to transfer the amount (By selecting "Proceed to Checkout " ).
But , if we choose Step 2 also(given below) the domain name is free.
Now , we get a domain name (www.puthuvamana.com) . After creating a web site , we can point the site to this address later.
But here , I am taking a server also, to host this site. If I didnt choose this option , I have to host my site through another method, refer How to host a site .
Step 1 : Privacy

Step 2 : Options (which contain hosting details)

Step 3 : Email (if you want to take email ids associated with your domain , that is yourname@puthuvaman.com , you can select this option).


Another Method :
Note that , the domain name must be unique. So , if this particular domain name is not registerd , we can see ,
Note that , Godaddy displays other domain like puthuvaman.in ,puthuvaman.info , puthuvaman.org etc. Select as per your choice.
Here , I choose puthuvaman.com only. And click continue to cart".
But , if we choose Step 2 also(given below) the domain name is free.
Now , we get a domain name (www.puthuvamana.com) . After creating a web site , we can point the site to this address later.
But here , I am taking a server also, to host this site. If I didnt choose this option , I have to host my site through another method, refer How to host a site .
2 : Hosting
Refer Some introductions to web to understand about "What is hosting" .Before choosing "continue to cart " option , note that , there are 3 STEPS (see above picture).Step 1 : Privacy
Step 2 : Options (which contain hosting details)
Step 3 : Email (if you want to take email ids associated with your domain , that is yourname@puthuvaman.com , you can select this option).
I am skipping the Ist step.
No protection needed for this web site :-)
Now , STEP : 2 .I chose the plan Delux . Choosing a plan is always upto your choice.
STEP 3 can skip , because if you chose any hosting plan , free email will also be there , like yourname@puthuvaman.com .
Now click "Continue to cart" .
- Select "Hosting &SSL" from Godaddy Home page.
- Select "Web Hosting" .
- Click "Continue".
- Then we can see another page , telling to choose a free domain , if we want .
"Add and Continue"
Then Proceed to Payment method.
The screen will look like this.
After giving the details , click "Place your Order"
3 : Set up a new Hosting Account
We already took a "Delux Hosting Plan" along with a free domain puthuvamana.com . Now , we are going to set up a new hosting account .
Select "My account --> Manage Hosting "
Then we can see ,
Click "Set Up"
We are going to set up a cPanel account for hosting a domain
(cPanel is a Linux based web hosting control panel that provides a graphical interface and automation tools designed to simplify the process of hosting a web site.
or, cPanel is a control panel available on Linux-based hosting accounts and servers. It lets you easily manage many aspects of your account, including the files, applications, and email hosted on your account or server.
cPanel utilizes a 3 tier structure that provides capabilities for administrators, resellers, and end-user website owners to control the various aspects of website and server administration through a standard web browser.)
- First , choose your domain (If there are more than one domain in your account , you can select it from the drop down menu).
- If want , we can enter a subdomain also (A subdomain is an easy way to create a memorable Web address for unique content areas of your site. For example, you could create a subdomain for pictures on your site called "pics" that is accessible through the URL pics.puthuvamana.com in addition to www.puthuvamana.com/pics).
- Create your Cpanel login credentials (it may or may not be same as godaddy username and password)
After giving the details and submitting , we can see
Click "Get Started" . And it will lead to the cPanel Home page as shown :
4 : cPanel Homepage
Lot of options are there.
(Comapre it with " Number 7 : Create a Google mail for the domain" ).
We will discuss each functions of cPanel in details , later .
Functions of cPanel
Have a look at the below given picture.We will discuss about "Accounts" later , before that know a little bit about the 4th option "MX Entry" . Topic number 5 explains to Migrate a domain mail to Google , something userfriendly platform. For this we have to know about what is MX Entry.
MX Entry
MX Record (Mail Exchange Record) is used by mail servers to determine where to deliver email.If an MX record is missing for the domain the mail for the domain will normally be attempted to be delivered to the matching A record. So for the domain “example.com” if there were no MX records for “example.com” then the mail would be attempted to delivered to the apex / root record of “example.com”.
MX records are DNS settings associated with your domain that direct its mail to the servers hosting your users' mail accounts. These settings are managed by your domain host, not by Google. To make sure mail always gets delivered, you typically create records for multiple servers, all of which can deliver mail to users. That way, if one server is down, mail can be routed to another server, instead. You determine which servers get tried first by assigning priorities, using values like 10, 20, 30, and so on. The lowest value gets highest priority.
For instance, if the domain example.com has two MX records—10 mail1.example.com and 20 mail2.example.com—mail is delivered first to10 mail1.example.com because it has the lowest number priority. If that server is down, mail is redirected to 20 mail2.example.com, and so on. If different MX records have the same priority, one server is chosen arbitrarily.
5 : Set up an email address
Now , we are going to set up an email address .
Have a closer look in the option "Mail" in cPanel.
- Click " Accounts" .Then we can see
Now , click "Create account". Then you can see ,
if you want a mail like "mail@puthuvamana.com" you can enter the name and password , and click "create account".
Enter simply" domainname/webmail " in a new browser (Control Shift N).
And type the user name and password there . Then you can access the newly created email platform.
cPanel includes three standard webmail applications (Web mail is a tool that allows you to send and read emails directly from any computer connected to the internet.)
That is , Horde, SquirrelMail and RoundCube are the hree webmail applications available to every Godaddy member. All of them have the same login page -- YourDomain.com/webmail.
cPanel direct login : http://your domain name/cpanel
cPanel direct login : http://your domain name/cpanel
Webmail Login
|
YourDomain.com/webmail
|
cPanel Login
|
http://your domain name/cpanel
|
As long as your website points to your Godaddy server, this address will work


You can now let Google handle your domain’s email while keeping your existing addresses. That means you still get Google’s webmail interface (exactly like GMail) but everything is tied directly to your domain. It’s called Google Apps.


Select any of the above application for emaililng (Roundcube is the best, according to me)
Select any of the three , and click "Enable" . Give the enabling time = 0 ).
6 : How to access your mail ?
In NO : 5 , we can see that , we can access mail from the cPanel , as ;
When clicking "Accounts" , it will lead into ,
You can see "Email Accounts" in the above picture.
(I already created 3 mail accounts).
To access a mail , click "more" of the desired mail .
Click "Access Webmail" .
It will lead into the webmail platform (**** See STEP Number 8 last) ,as shown below :
The step given above is for the one (Admin) who accessing through cPanel (http://your domain name/cpanel)
For a user , who dont have the permission to access cPanel , give the address" YourDomain.com/webmail " in the web browser , and give the user name and password directly.
(https://login.secureserver.net/ is the workspace login.What is the difference between workspace and webmail ? Will post soon ).
7 : Create a Google mail for the domain
How to use your domain name with Googles Gmail webmail service
In the above picture , we can understand the platform of the web mail we created like mail@yourname.com
We all are familier with Google mail (Gmail) . But is it possible to get a Gmail platform for the created email id ?
Lets start..!!!!
You are going to Migrate Your Custom Domain’s Email to Google (And Maintain Your Addresses)
Click the below given link .
Or , Click "  Apps for Work"
It will lead you into ,
Click "Get Started" .
Give the details and click "Next" . (Note that puthuvamana.com is the domain we purchased from Godaddy , have a look at point number 1 & 2 above) .When we click "next" , google will ask you about the domain , as given below :
Here , I already purchased a domain , so using the first option , then click "next" .
When you click "next", you can see another option for giving your domain name .
After giving the domain name u have already purchased , click "next" (You can buy a new domain also.I am not giving you the steps for that).
Here. "contact" is the user name .
Click "Accept and signup".
The Admin Panel of the created mail id :
Comapre it with " Number 4 : cPanel Homepage " .
From the above pic , click "Users" .
It will lead to a screen , where we can add users .See below :
Click the "plus" symbol for adding users under the domain "puthuvamana.com.
You can enter the desired user name for the domain (The password can st to "Auto-generated one").
Click "Create" .
We can create another user , print & email instructions etc.
8 : Changing Domain to Google (To
get a Google mail)
Note that , the domain verification is pending still..
From the admin console,click "Verify Domain".
Note that puthuvamana.com is the domain we purchased from Godaddy , have a look at point number 1 & 2 above .
Click " Take me to GoDaddy.com " and it will lead you to the sign-in page of your GoDaddy Ac
count , as given below :
Give your user name and password.Acd click "Login".
Now you can see a dialog box in which , Google is requesting permission to make changes to your DNS For the domain name.
See below :
Click "Accept" .
And , you can see Googles confirmation message as ,
Click "Okay,got it!" .
Then it will lead you back to the Admin Console.
(Note the first picture in point number : 8. It is the Admin Console before verifying the domain. And see the below given picture , after verifying the domain from GoDaddy ).
We point our domain to Google DNS, and now you are able to see your Gmail inbox in urname@domainname.com. See , this is very userfriendly console (as it is Gmail) , than webmail like roundbox etc.
From this stage onwards, you can mail from your new account .
But still there is a problem , that "there is no incoming mail to your account" or the mail anybody sent to urname@domainname.com will delivered to your old webmail platform (****).
Reason :
9 : Start using new Gmail
Sign-in to Admin Console.
Click "Add Users"
We added users already (see point number 7) , so click NEXT .
Note that , we already pointed our domain from GoDaddy to Goggle.
Now , its the time to point our domain's mailflow to our Google Apps account.
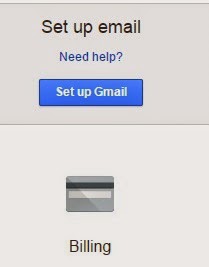
And , click "Set Up Gmail" .
Now , you can see ,
Click "Yes,take me to GoDaddy.com"
And , after routing mail to Google , we can see ,
Click "Done" .And you will be redirected to the Admin Console again.
Now , its the turn of Billing :-) ,
Click "Users" to view the already created users , and to create new ones.
=====================================================================================
Now , its the turn to create a web site.
10 : Creating web sites
Refer the link Creating web sites .
Now , create web sites in your desired platform . After designing a web site we uploaded using Filezilla (refer Hosting a web site ) , if we dont set up a cPanel .
But here , we already set up a cPanel, and I will describe how to upload the web site through cPanel.