Walk Lightly on this PLANET and yet leave such a FOOTPRINT that cannot be erased for thousands of Years..!!!
Visit Codstech for Cyber Security related Posts !

Visitors

Tuesday, December 31, 2013

Designing a simple wordpress site - Widget

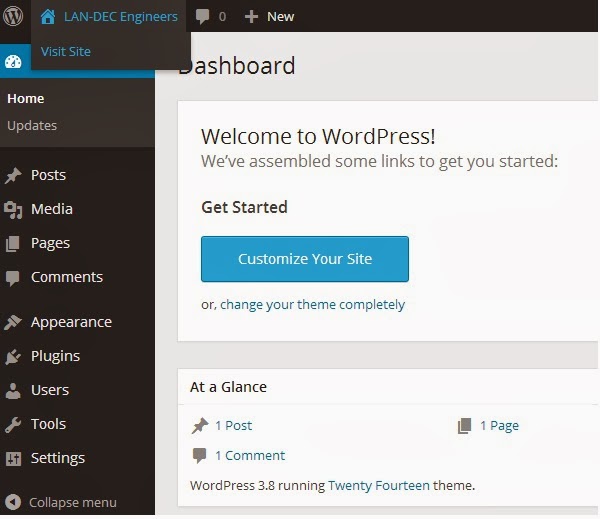
Open the web site we created ( explained in Introduction to Wordpress ) , and login to get access to the Admin area.


STEP - 6

In the tutorial "Designing a simple wordpress site - Pages" , we are re-designing the HOME page.
See the complete HOME page design,


We changed the 1st part of the web site (instead "Hello World" , we include "LAN-DEC Engineers" etc.
That is ,


Note the below portion as Home Widget 1 ,  Home Widget 2 &  Home Widget 3 .
Now we have to change this .
Refer Designing a simple wordpress site - Plugins also .

In the admin panel ,take the option Appearance --> Widget 
The widget in the admin area are (Except in the HOME page) ,


And see the page with widgets in the site as ,


Drag each items , we do not want in the pages , to the left side , where there is a place for keeping the inactive  widgets.
I kept SEARCH only  .All the inactive widgets are thus moved to the corresponding area , as


In the admin panel ,take the option Appearance --> Widget , only one widget remains then , as


Refresh the site , and we can see that , there is only one widget (SEARCH) remains .


To change the HOME page widget , 
Goto  Appearance --> Widget , you can see there Home Widget 1 ,  Home Widget 2 &  Home Widget 3 . 
Drag the widgets from the left side to the first widget (say , Home Widget 1 ).

If you want to include any other widget , which is not there in the left side widget list , then click Plugins --> Add new  .
Install the plugin you want , 
then go to Appearance --> Widget again , select that installed widget , drag and drop to Home Widget 2 ..etc.

Repeat the steps.
You can understand this portion only if you covered all the other 5th steps , given above.

Difference between Plugin and Widget :

You may have this doubt now ...
Simply telling , a Plugin will give you a Widget.
Or , in order to get a Widget , we have to install corresponding Plugin .

Steps I did in designing the rest portion of the web site :

  1. There are 3 widgets in the HOME page of the site. First goto Appearance--> Widget and Drag the "Calendar" widget to Home Widget 1 .
  2.  Installed and activated a plugin named "Black Studio TinyMCE Widget" . It is  wordpress editor.It will help us to input text in both visual and HTML mode.Again visited to Appearance--> Widget and drag the installed Black Studio  widget to Home Widget 2 . Gave the title as "Join us on FB" (Visual mode) , and click "Save" .Then Installed and activated a plugin named "Facebook like box .Then goto Appearance--> Widget and Drag the widget to Home Widget 2 .
  3. Downloaded a plugin named "Loading Page" (Google search) and uploaded it to the Admin panel.Then activate it, and goto Appearance--> Widget and Drag the widget to Home Widget 3 .
=========================================================================

Back to Wordpress

Designing a simple wordpress site - Menu

Open the web site we created ( explained in Introduction to Wordpress ) , and login to get access to the Admin area.


In the tutorial "Designing a simple wordpress site - Pages" , I mention that we can re-order the pages created .


Menus are used for this purpose .

In order to rearrange the pages in a particular order ,
Select Appearance --> Menus from admin panel of the web site .


Then we can see ,


Give a name for the menu (say menu1) , and click "Create Menu" , as shown below : 


Some other options can seen then , select "header menu " and click "Save" .


Note that , some other options also are there . But we have created all the pages in the top of the page of the web site.
So we choose "header menu " .

Now select all the created pages and click "Add to Menu
(Note that HOME page is not here in the list) .


Then we can see that , all the created pages come under "Menu" on right side , as shown :


Drag each item into the order you prefer. Click "Save Menu" .
I choose the order of the page as ,


Note that HOME page is not here in the list .

Visit the web site and see the HOME page there . 


To include HOME page  also in the MENU , do this , give the url of the home page in the URL , and give link text name as HOME .


Then click "Add to Menu" .

Then we can see that , the HOME page also come under "Menu" on right side , as shown :


Now drag it in the top of the Menu as shown :


And , click "Save Menu" .
Now go back to the site , and refresh to view the pages in order , as ;


========================================================
Next , we are going to make changes in the HOME page. .
Click  here to understand about "Theme option" in a wordpress page (STEP - 2 (E)).
Back to wordpress

Designing a simple wordpress site - Comments in a page

Open the web site we created ( explained in Introduction to Wordpress ) , and login to get access to the Admin area.
Step - 1 : Refer Designing a simple wordpress site -Theme
Step - 2 : Refer Designing a simple wordpress site - Pages
Step - 3 :  Refer Designing a simple wordpress site - Plugins


STEP - 4


The above given picture is the portion of our "About us" page in the site.
Note that , this page has a comment section below that.
You can sometimes feel that , some pages doesnt need a comment section.

In order to avoid a comment box from a page , do this :


From the admin panel , select the "Pages" in which you do not want to include a "Comment Box" .
For example , I do not want a comment box in "Contact us page".

So , select that page.


You can see "Screen Option" on the top of that page .


Click the arrow as shown in the figure. Then we can see that ,


Click "Discussion" . Whatever option we selected , the corresponding field will be displayed in the bottom of the page , as , 


You can see , two options are there for "Discussion" . Both options are ticked .And if we want to avoid comment box in the "About us" page , just un-check the 2 options .That is , 


Now click "update" and refresh our site to view the result.

========================================================
Next , we are going to Create Menu .
Click NEXT to understand about "Menut option" in a wordpress page.
Back to wordpress

Monday, December 30, 2013

Designing a simple wordpress site - Plugins

Open the web site we created ( explained in Introduction to Wordpress ) , and login to get access to the Admin area.
Step - 1 : Refer Designing a simple wordpress site -Theme
Step - 2 : Refer Designing a simple wordpress site - Pages

STEP - 3

Picture - 1

Go to the Admin page (Dash board) .
See the Admin options in the left side.

Now we are going to add Plugins .
Contact form is an Example of Plugin.We are going to add a contact form in the page "Contact us".


  • Select  Plugins --> Add new (Click Add New from the window)


Then we can see  ,


Search "Contact Form" .
Then we can see a number of plugins of "Contact Form" .


Select one Plugin from the list , and click "Details" .


It will show the version and ratings of the Plugins.(If the plugin is not support with your current wordpress version , it has to be avoided. Or , we can see a message sometimes as
"Warning: This plugin has not been tested with your current version of WordPress." Avoid such plugins.

If everything is ok , select one contact form from the list and Click "Install Now" as given in the above picture.When we click "Install" , we can see;


Click "Activate Plugin ".After activating , we can see a new menu option "Contact Form" in the left side as shown below :


Or ,  select Plugins --> Installed plugins . Then we can see that ;


Click "Settings" , then , we can see


Copy the short form of the code as given in the above figure .
Now select our page "Contact us" , as explained before , select the "Text" mode and paste the code there.


Now click "Update" , and return to the site .Refresh it , then we can see,below the Google map , a contact form also added as given below :


Refer Designing a simple wordpress site - Widget also, because we are installing some more plugins there , in order to get some additional widgets.
========================================================
Next , we are going to Create/ Edit comment forms .
Click NEXT to understand about "Comment option" in a wordpress page.
Back to wordpress

Designing a simple wordpress site - Pages

Open the web site we created ( explained in Introduction to Wordpress ) , and login to get access to the Admin area.
Step - 1 : Refer Designing a simple wordpress site -Theme


STEP - 2 (A)

Now we are going to create pages for our web site.

The web site created is look like this.


Go to the Admin page (Dash board) .

Picture - 1


See the Admin options in the left side.
Now we are going to add pages this site.
To do so , select Pages --> add new .
Then another page will displayed , give title and content in the respective fields.
Note that , there are 2 options like Visual & Text in the right side of the box , if we choose Text , we can add HTML code there . 
We are going to create an About us page here . 

See the picture below :

Click Publish to publish the page .

You can see an option Add Media below the About us title , click that .
Select a picture to insert .
Click update .

Picture - 2 

Note the picture added.
Move the cursor on the picture , then we can see a popup message Edit Image , and by clicking that , it will lead to the edit page.


Note the Link URL , if we copy that link URL and paste it in the browser , we can see that picture .It shows the location (Path) of the picture .
(We need this Link URL in some other place, in the coming sessions).
Close the box and return to the pages.

There is another option in Settings --> Permalink  .
See picture-2 and the permalink url of the page .
(Detailed description of this option will follow in coming sessions).

STEP - 2 (B)

We are going to create another page named "Contact us " using Google map .

  • Click here to view Google map home page .
  • Select your location from the map .
  • Then click the "Link" icon ,and a popup window opens.
  • From that , click "Customize and preview embedded map"
  • Another window will open then , and you can resize the map , and below that you can see a message "Copy and paste this HTML to embed in your website " . copy that HTML code .
Next come to the Dashboard.


Click pages --> New page and name the page as "Contact us". (Refer Designing page).

And paste the HTML code in the Admin panel of the page "About us" .
Note that , select "Text" while pasting the HTML code in the page.
(There are 2 types of views for a page .They are "Visual" & "Text" )
If we want to type anything , dont forget to select the "Visual" again .

See the figure below :


This is the "Visula " view of the page in the admin panel.
Select the "Text" mode from the right side , as seen in the above picture, we get ,


Note the width and height of the google map in the code.
We can resize it as per our requirements.
But when we resize the site window , the google map does not resize itself , as per the width.
To resize the width of the map with respect to the page , give  width = 100% .

Now , go back to the web site and refresh the page.The page is look like ;


Note that , while typing the address, I selected the "Visual" mode of the page , and while pasting the HTML code of the Google map , I selected the "Text" mode. In some cases , Instead of "Text" , we can see "HTML" itself.

I explained the steps to create 2 pages (About us & Contact us)
You can create any number of pages in your web site.

STEP - 2 (C)

To delete any unwanted page 


To delete any unwanted page , select that page , and click "Trash" , and click "update" .


STEP - 2 (D)

Rearrange all the pages we created 

We created a number of pages , and the order of the pages that are appeared in the web site may be some thing like that .


In order to rearrange the pages in a particular order ,
Select Appearance --> Menus (This section comes in "MENU" . So , click here , to know about that .

STEP - 2 (E)

Making changes in the HOME page

We created a number of pages , and the HOME page among them , should be more attractive .
So in this section , I am givings one more ideas to design the HOME page .

At first , have a look at the HOME page design from your site.


We are going to re-design this HOME page .
From the admin panel , take Appearance --> Theme Option .
(Appearance --> Theme is used to Install themes . Click here to refer)


Then we will be re-directed into another page , as shown :


There is an arrown on the right side of each options , expanding which will give the sub-options .


And give Headline , sub Headline ,Content area etc , as shown :


The balance options ,


Call to Action means , when we click this , specify , in which page you want to go.I specify the link of "About us" page.
And Call to Action (Text) is MORE .
Now we have to input the "Featured Content" option.Click the "Add Media" browse the file (Image) , we can see the "Attachment Details" in the right side , copy the code of the image , and below the box of "Featured Content" , paste the code like this :


Write   <img src = " " />  
In between the inverted comma , paste the code as shown in the above picture).

Click "Save Options" .

Now refresh the HOME page , and the result will be ;


In the HOME page , there are some widget part also. 


Click here to know about changing / Adding Widget .

========================================
Next , we are going to create Plugins .
Click NEXT to view how to add Plugins .
Back to wordpress